
Your shopping cart is empty!
Каталог дополнений
News and articles

liveopencart.ru - official partner of opencart.com
09 April 2025

We have received the status of an official Gold Partner of Opencart.com
→
Changes to the Virtual Consultant interaction schemes
08 April 2025

Changes to the Virtual Consultant interaction schemes from EasyTokens
→
Best-selling templates and extensions in March 2025
03 April 2025

Best-selling templates and extensions in February 2025: bulk product editing, WebP support, advanced menu, Cool Premium Template
→
Selection of new modules for Opencart for March 2025
01 April 2025

New in March 2025: several types of captcha, Telegram notifications, product pre-order
→How to Install Opencart, Opencart.pro, OcStore

There are often questions about installing Opencart (Opencart.pro, OcStore) on hosting, so we present you with a small guide with some specific instructions for Timeweb hosting (by the way, we also have a small review of this hosting).
1) First, you need to download the distribution package, which you can do, for example, from this page.
2) After that, unzip the archive and upload the contents of the upload folder to your hosting.
3) In some versions, after copying, you need to rename two files:
config-dist.php
admin/config-dist.php
You need to remove -dist from the name, so the resulting files should be
config.php
admin/config.php
Rename the file .htaccess.txt to .htaccess
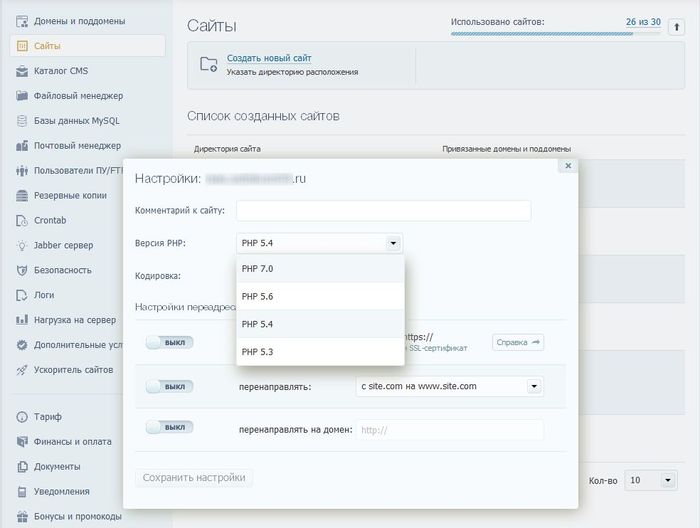
3.1) For Timeweb, additionally, you need to do the following:
Change the PHP version in the site settings to 7.1
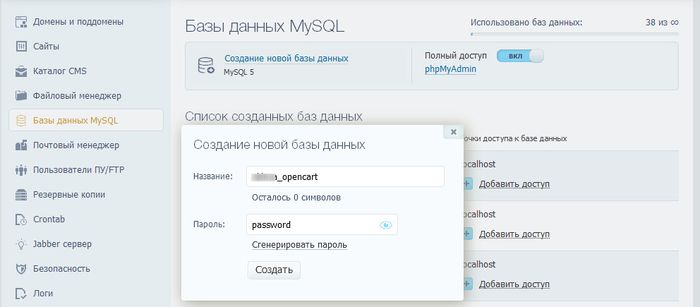
4) Don't forget to create a MySQL database. For Timeweb, this is done as follows:
5) In the browser, go to your-site.ru, and you should see the following:
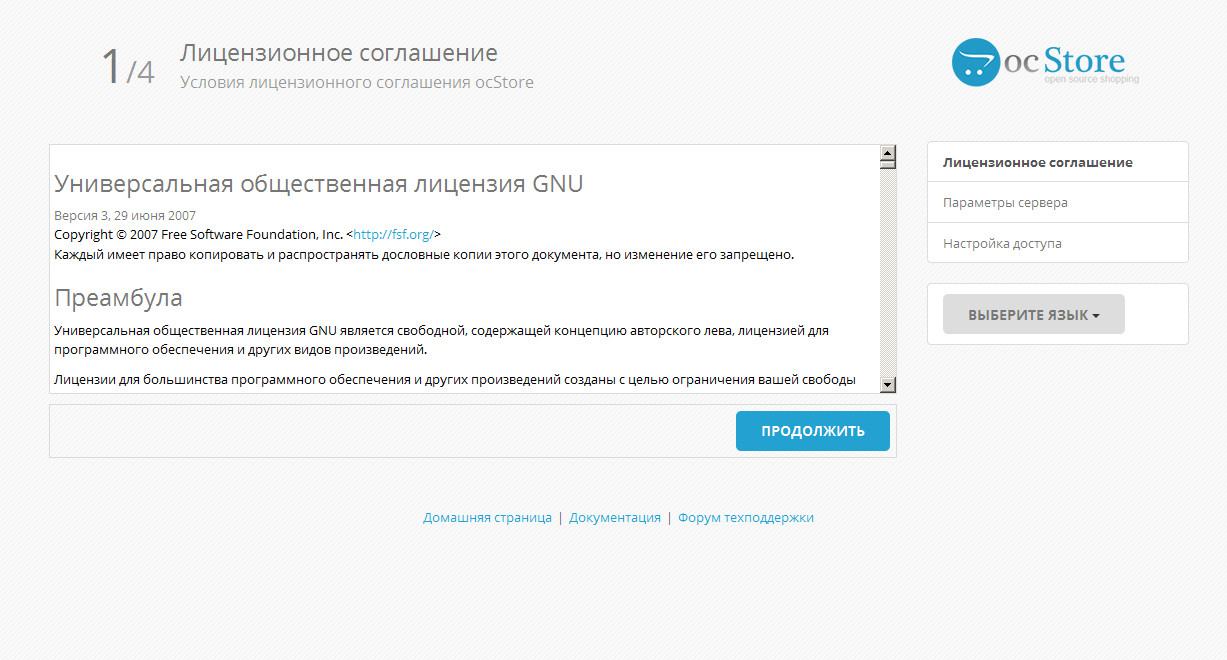
6) Click "Continue".
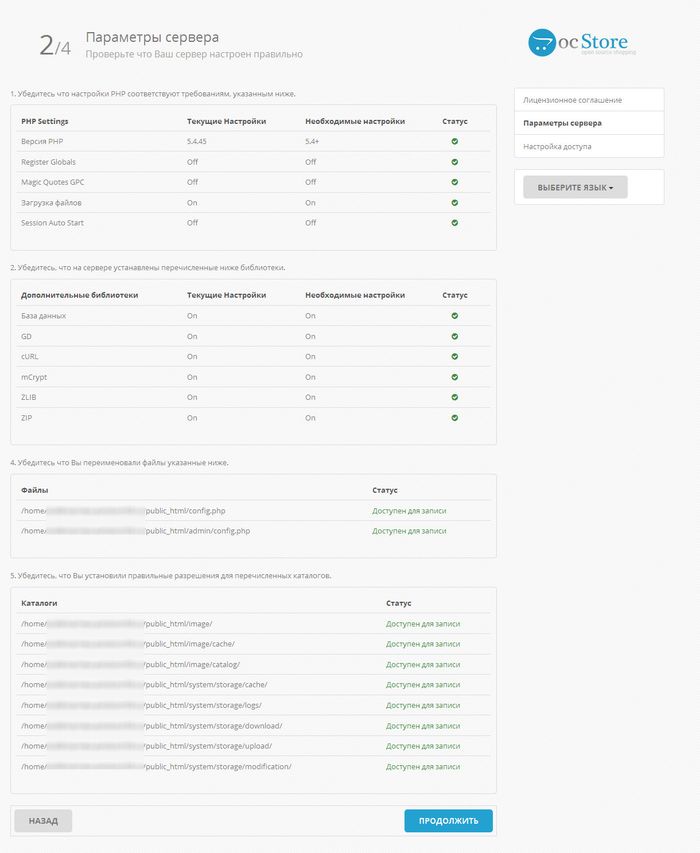
7) Here the installation script checks the settings of your hosting and the permissions of the following folders and files (should be 777):
config.php
admin/config.php
image/
image/cache/
image/catalog/
system/storage/cache/
system/storage/download/
system/storage/logs/
system/storage/modification/
system/storage/upload/
If everything is correct, you should see the following (all green checkmarks):
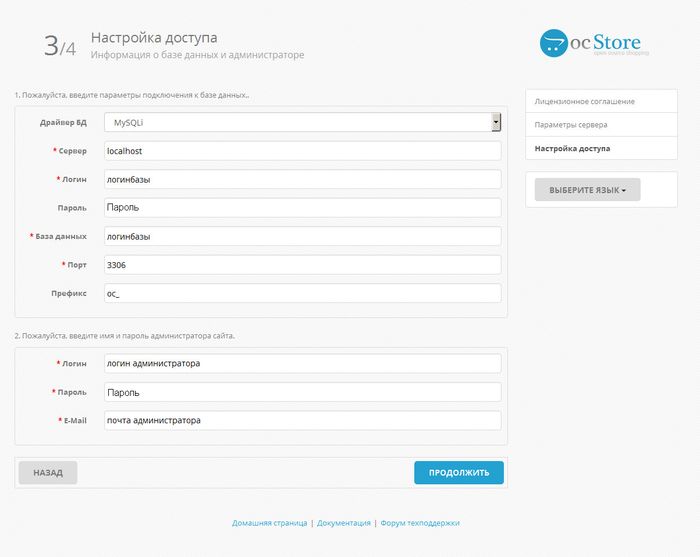
8) Click "Continue" and enter the MySQL database access parameters and administrator registration details:
9) Click "Continue" to proceed to the final screen:

10) Don't forget to delete the following folder from the hosting:
install/
and it's better to set the permissions to 644 for the files:
config.php
admin/config.php
Installation is complete
Рекомендуем посмотреть


Рекомендуем прочитать


Slyvenus / 29 November 2020 #
При попытке войти в панель администратора в окне браузера выходит сообщение:
Notice: Error: Could not load template /home/c/cy82003/fungi/public_html/admin/view/template/common/login.tpl! in /home/c/cy82003/fungi/public_html/system/library/template/php.php on line 28
Посмотрел,....по указанному выше пути файл login.tpl отсутствует. Что может быть не так?
Notice: Error: Could not load template /home/c/cy82003/fungi/public_html/admin/view/template/common/login.tpl! in /home/c/cy82003/fungi/public_html/system/library/template/php.php on line 28
Посмотрел,....по указанному выше пути файл login.tpl отсутствует. Что может быть не так?
Гость / 09 June 2020 #
при установке обязательно воспользуйтесь этой сборкой, тем более скидка на нее очень хорошая сейчас) https://liveopencart.ru/opencart-moduli-shablony/opencart-pro/opencart-pro-2-x
Гость / 09 December 2019 #
Подскажите, купил хостинг на reg.ru и панель управления cpanel - есть инструкция как на нее поставить olpencart.pro?
koteiko / 15 March 2019 #
При установке ocstore 3 система предлагала автоматически перенести каталог storage в корень из папки сайта. При установке OPENCART.PRO Версия 2.3.0.2.5 не предложила. Надо ли это сделать и если надо то зачем?
fortagro@list.ru / 11 February 2019 #
файл .htaccess.txt не переименовывается в .htaccess, требует расширение. Что делать?

 liveopencart / 26 May 2018 #
возможно ваш хостинг создает файлы для поддомена, попробуйте перезаписать.
domtextil / 25 May 2018 #
Указано, Переименовать файл .htaccess.txt в .htaccess. Переименовал, при переходе на сайт, показывает ошибку 500. Переименовал назад - заработало. Как быть?

 liveopencart / 25 May 2018 #
на вашем хостинге есть возможность автоматического исправления .htaccess выполните ее
liveopencart / 26 May 2018 #
ну собственно говоря автоматическое исправление хостинга делает тоже самое, если я не ошибаюсь


